Windows can put computer in sleep mode after certain period of inactivity. You can easily configure and set this time, as per requirement. Once you set specific time, say 30 minutes – computer will go to sleep mode if there is inactivity for 30 minutes. You can modify sleep time settings from power options in the Control Panel. This is very useful feature as it saves power and computing power of PC hardware – as computer it set to sleep mode when not in active use.
Change time to put computer to sleep on Windows 7
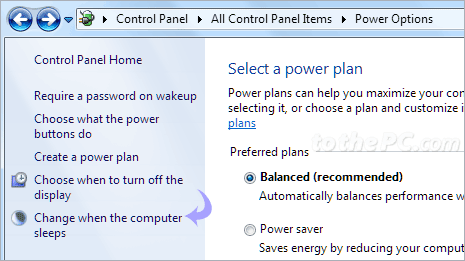
1. Click Start button and then Control Panel. In the Control Panel window click Power Options. Then click ‘Change when the computer sleeps’ option on the left sidebar.

Alternatively, you can click Start and type sleep in the search box to view ‘change when the computer sleeps’ option directly on your Windows 7 computer.

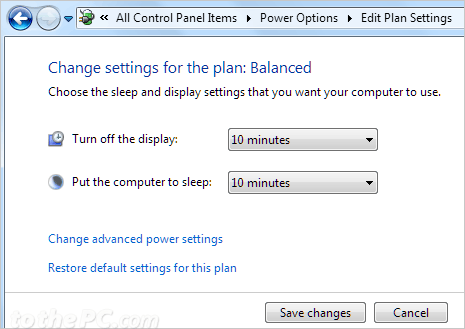
2. Then select time from drop down box among various options like 1min, 5mins, 10mins, 1hour, 2 hours and more. Click Save Changes button to activate new sleep time settings on your Windows 7 PC.

If you do not want computer to go to sleep during inactivity, select never option (at the bottom) in the drop down box. In this case, computer will always be ON and won’t go to sleep mode (unless it is manually turned OFF or put to sleep mode).
Ideally, if you use computer for long duration and take breaks regularly – it is recommended to setup sleep time settings. As this will put computer to sleep mode when you take break and you can always resume work from the previous pre-break state.
