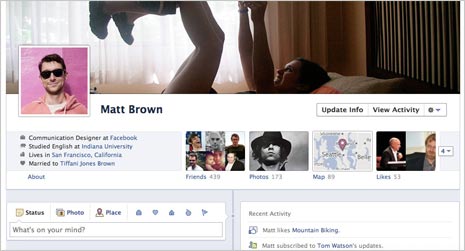
Facebook has introduced new ‘Timeline’ feature for all users. Every Facebook user add new content everyday by making status updates, sharing photos, like something, adding comments, uploading videos and lots more. As new content is added, old shared content is buried deeper and becomes difficult to discover. Timeline address this problem and creates a profile page that display all important stuff from this time you started sharing on Facebook.
What is Timeline page on Facebook
It display important information about you in chronological date-wise order from the time you were born till today. It is an enhancement of your older Facebook profile page and is more visual with big photos.

Besides showing your current status, it displays all important stuff related to you over period of time. You can customize your timeline page to any extent by editing and adding specific information, photos, videos, information and more.
Register for Timeline feature & wait for invite
Timeline feature will be rolled out to all users slowly in coming days. To ensure that you are first one to get invite for using Timeline feature, make sure you register for the same.

1. Click here to open official Timeline page on Facebook website. It shows sample timeline profile page highlighting the cover photo page, stories and apps in use.
2. Click Sign Me Up button at bottom right to register for Timeline feature in your Facebook account. You will see ‘Login’ button instead of Sign Me up, if not already logged into your Facebook account.
Use Timeline now using simple ‘developer’ trick
Timeline feature is available to all developers as of now. So, if you create an App in Developer section of your Facebook account – you should able to use Timeline feature. This may sound geeky but it is very easy to implement (just few simple clicks and timeline is ready for use).
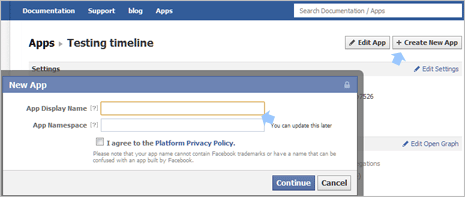
1. After Facebook login, open developers.facebook.com/apps website. Then click on ‘Create New App’ button at top right part of the webpage.

2. In the pop-up window, enter any name for: app display name and app namespace. For example: you can enter “Testing timeline” in app display name and “timednow” for app namespace. Then click Continue button and enter security keyword and click Submit button.

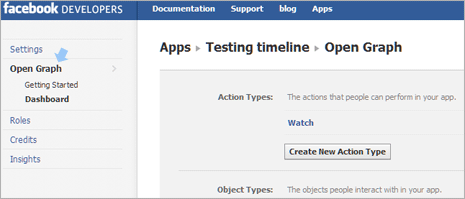
3. Now you should see main settings screen of the created app (otherwise click app name on left side and then click ‘edit settings’ button at top right part). Then click Open Graph option on left side. Here you need to select some app action. For example: watch movie. Then click Get Started button and you should see as in screenshot above.

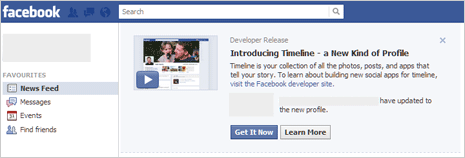
4. Now open Facebook.com website and you should see invite to create timeline at the top. Click Get it now button to view your timeline page. You can get going with editing and adding new information and photos to the timeline. You can open your timeline page anytime using this URL http://www.facebook.com/NAME?sk=timeline (replace NAME with your actual Facebook username). [via PC world]
