Due to shortage of IPv4 addresses, IPv6 system was introduced with better security features. While it is enabled and present on Windows 7 & Vista computer, it is hardly used by any application or device as of now. So, you may disable IPv6 on the computer as this may result in better network performance and save CPU memory.
Temporary way to disable IPv6
Following procedure disables IPv6 feature for LAN and is temporary. It is enabled back, once you restart the computer.
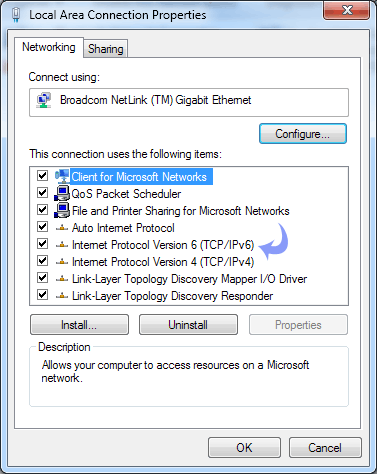
1. Goto Control Panel > Network and Internet > Network Connections.
2. Right click on ‘Local Area Connection’ & click ‘properties’ option.

3. Uncheck ‘Internet Protocol Version 6 (TCP/IPv6)
4. Click OK & close dialog box.
Permanent Registry method to disable IPv6
1. Click Start > Run and then type regedit in the run box. This will open the Registry editor window on your computer.
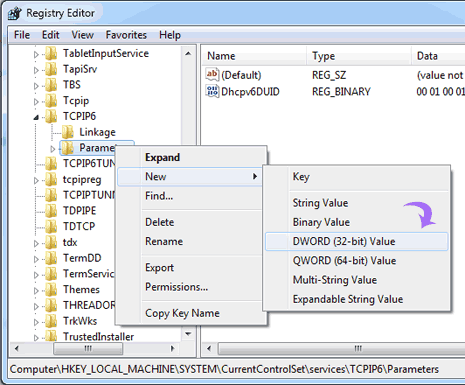
2. Now navigate to:
HKEY_LOCAL_MACHINE > SYSTEM > CurrentControlSet > services >TCPIP6 > Parameters key

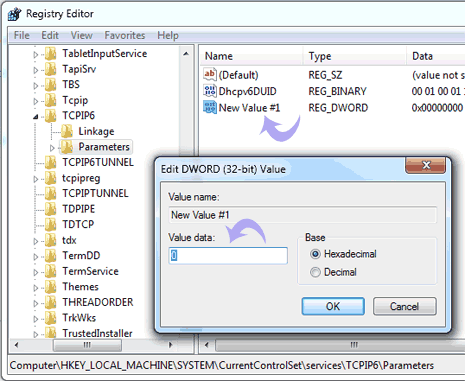
3. Right click Parameters 7 then goto New > DWORD (32-bit) Value. New Value #1 will appear.
4. Double click ‘New Value’ & enter 0xffffffff in ‘value data’ text box and click OK button.

5. Restart your Windows PC. IPv6 will be permanently disabled on PC. You can re-enable IPV6 on the PC by deleting the newly created value as made through above above steps.
