An average Windows 7 user may not use all features. Even though features are not used they still consume system resources and processor time. Homegroup is one such feature that you may not have used on your Windows 7 computer. You may have setup homegroup feature accidentally during first time Windows 7 setup. You can easily disable it and remove (or hide) Homegroup from left navigation sidebar in Windows 7 Explorer.
Leave a joined Homegroup on Windows 7
If you have joined Homegroup on your Windows 7 computer, make sure you leave it before proceeding to disabling of Homegroup feature permanently.
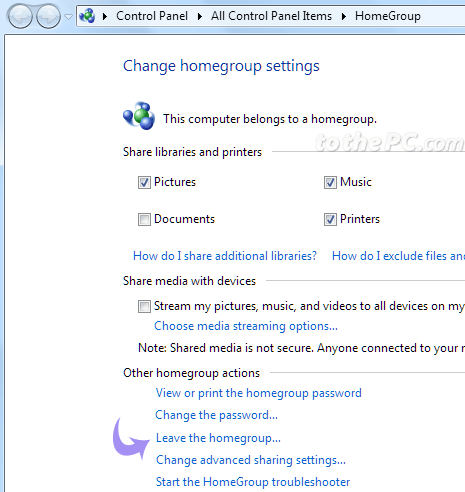
1. Click Start, type homegroup and press Enter key to Homegroup settings. Alternatively, you can goto Control Panel > All Control Panel Items > HomeGroup

2. Click ‘Leave the homegroup’ option at the bottom of Homegroup settings dialog box.
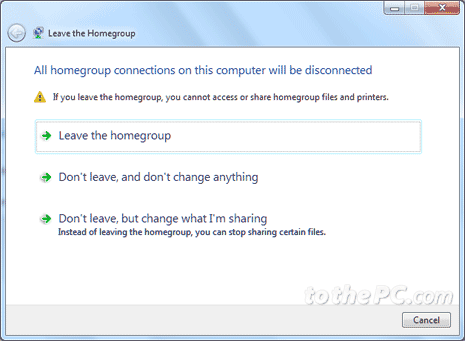
3. Again click ‘Leave the homegroup’ option on the confirmation screen.

Once you leave homegroup, you can proceed to disable of Homegroup services on your Windows 7 computer. This is will actually disable Homegroup feature and remove it from Windows Explorer.
Disable Homegroup services in Windows 7
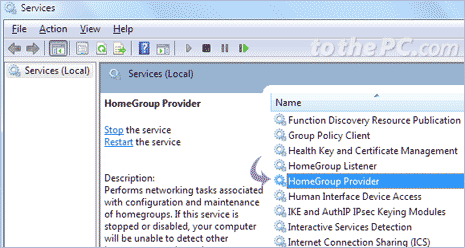
1. Click Start (Orb) button and type services in search bar. Then press the Enter key or click on ‘Services’ listing to open Services dialog box.

2. Scroll down list of services and double click on ‘Homegroup provider’ listing to open Homegroup provider properties.

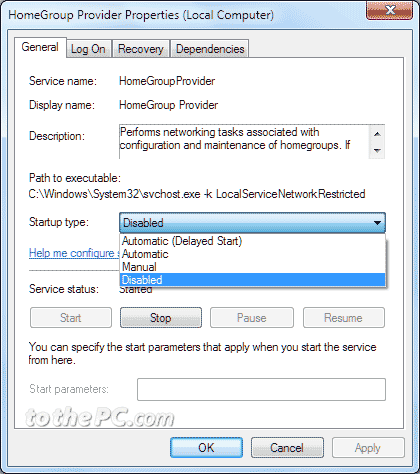
3. Select ‘disabled’ option next to ‘Startup type’ from the drop down box. On next Windows startup, Homegroup service will not launch. Click stop button to immediately stop homegroup service
4. Then Click Apply and OK button. Close previously opened Windows.

5. Now open Windows Explorer (press Win + E keys), there will be no homegroup option on left side of Windows Explorer on your Windows 7 computer.
