By default Guest account is disabled on Windows 7 computer. It can be used by users to login into computer when you do not want them to access your files. Guest account allows a user to log on to a network, browse the Internet and shut down the computer. You can enable guest account or keep it disabled when not required. You can also customize it further by changing Guest account name.
Turn ON guest account on Windows 7
1. Click Start (Orb) button, type user accounts and press the Enter key. Alternatively, goto Control Panel > User accounts and Family Safety > Add or remove user accounts.

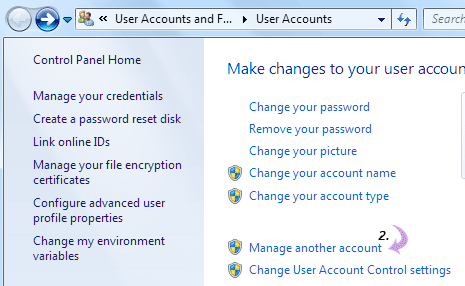
2. Click ‘Manage another account’ in User accounts window of the Control Panel.

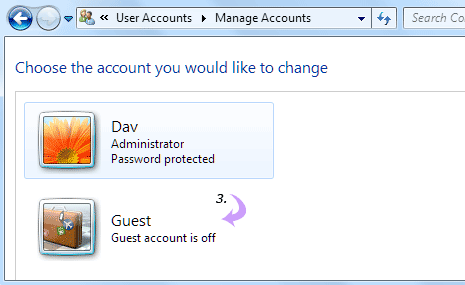
3. Click on Guest account icon (will read: Guest account is OFF).

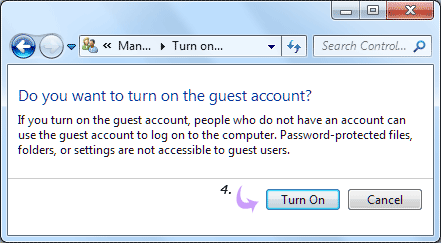
4. On the next screen click ‘turn ON’ button asking for ‘Do you want to turn on the guest account?’. This will turn ON and enable Guest account on your Windows 7 computer.
Enable Guest account on Workgroup computer
1. Click Start (Orb) button, type lusrmgr.msc in search box and press the Enter key. Enter admin password if you get prompt for the same.
2. Click Users and then double click Guest.
3. Select clear the Account is disabled check check box to enable Guest account on the system.
